Note, this builds upon the bulkheads built in the 'Cutting Bulkheads' section, so if you haven't looked at that, you might want to.
So, now given the bulkheads made before, we want to make holes in the center to fit a specific size motor tube, and we want to do it easily and we don't want to lose our fingers in the process.
The key to making good centering rings (specifically the inside hole of centering rings) is a good router circle cutter. We won't use the circle cutter to make the holes themselves, but rather we will use the circle cutter to make the template to make the holes. Here below is a circle cutter I had machined when I decided that it would be too expensive to have someone machine me all the templates I would need... My machined circle cutter for my router was $75. You can get a cheaper circle cutter from www.woodcraft.com (but I can't attest to it's accuracy). It is basically a base that attaches to the base of your router and provides a screw that is put through a center hole which allows you to 'spin a circle' around the center hole. You then use the router to clean out the interior wood. [Note that I also had the machinist make me precision machined router bases also. Since you will be changing your base frequently, you want something that fits precisely in your router without 'slop'.]
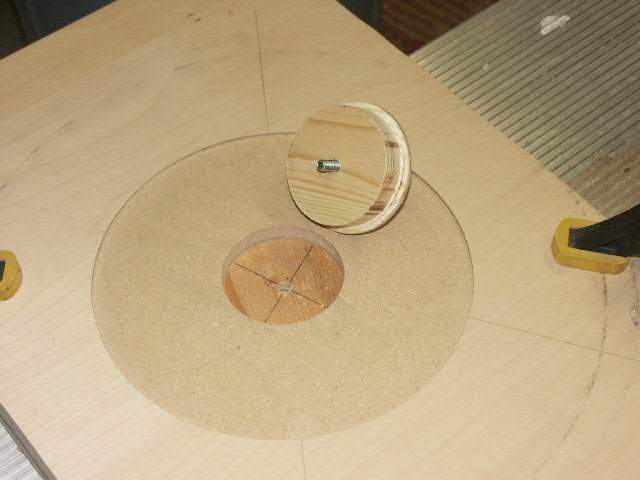
The basic idea is you're going to make bigger circles that when your router base is set inside of will route the correct size inner circle EVERY TIME. In the next picture, the top piece of wood is sized so that when the router base is put inside the recess in the wood and moved around the circle, it will cut a 54mm centering ring hole. (You'll want to blow the dust out of the recess frequently because it is accurate enough that the dust will make a difference...). The bottom board was used as a 'hold down' to hold the bulkhead while it is being routed. I think that is less needed now that I have an alternative (see lower down).
The basic idea was to put the bulkhead on the lower piece (with a recess to hold it) and then put the top piece on top and align with the 3 screw holes, then route the centering ring.
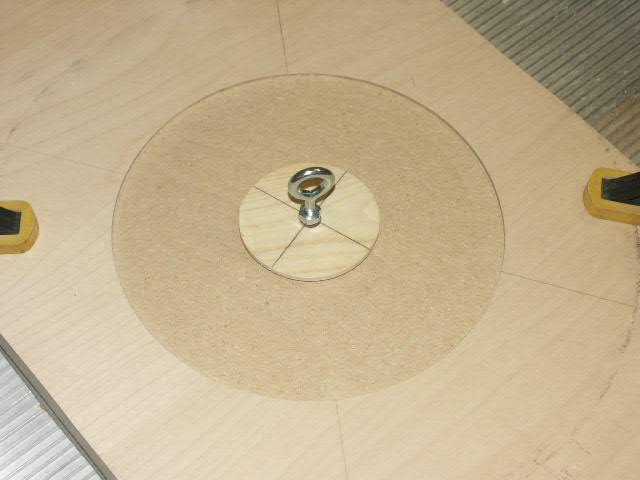
This worked pretty good except that I found out that my alignment for my templates wasn't exact and so all my centering rings were a little off. So really, I only wanted to align it so the bulkhead hole was in the center of the top plate... So I made a piece of wood (with the bulkhead cutter) that fit precisely in the hold of the centering ring maker. By putting a bolt through it, it aligned the centers. See the next two pictures:
After you get the bulkhead centered in the next picture, then clamp the top piece down. The clamping down holds the bulkhead down so it doesn't move while you route it.
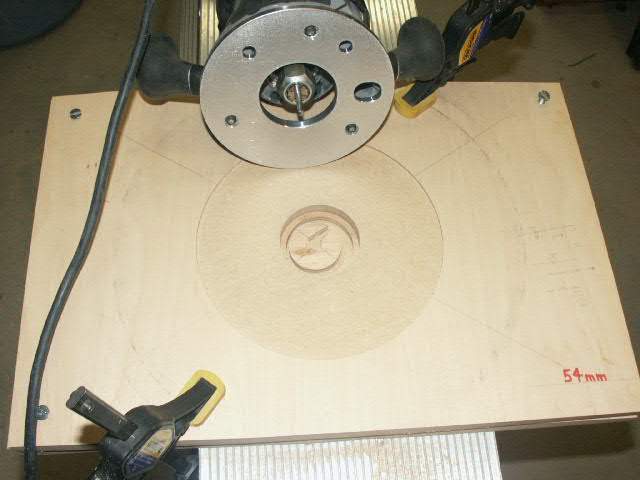
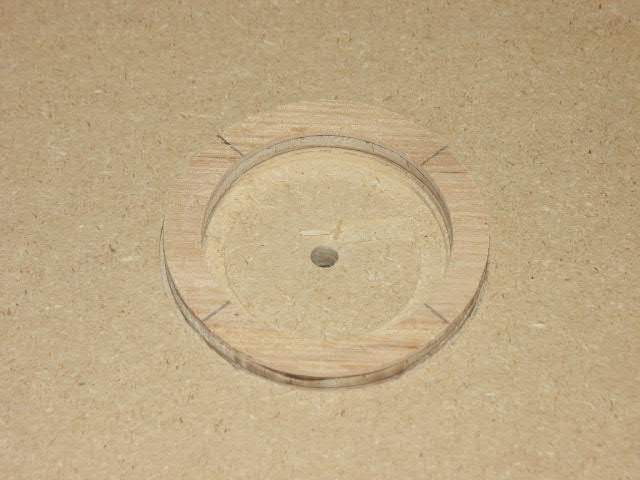
Now with the centers aligned and clamped down, remove the alignment tool above and simply move the router around the recess and it will cut an inner circle of the right size. And it is very repeatable. The next few pictures don't have verbage as they seem self explanatory. [Note in this picture, I started my route from the center and went to the edge and then around. If I had instead just done the edge, then the little cutout in the center would have been just a little large for a 38mm bulkhead, but the bulkhead cutting jig would be able to trim it down.]
==> This page was originally done in Feb 2003. I have since decided that the centering rings at Red Arrow Hobbies are much cheaper than risking my fingers so now simply order them. => http://www.redarrowhobbies.com/centering_rings.htm